If you’ve ever stained a white shirt or wanted to try custom designs on fabric, you’ve probably run into the humble bleach pen. These handy tools let you target spills, tackle old mildew in grout, or doodle on dark T-shirts for custom patterns. Store-bought versions work well, but making a DIY bleach pen can save money, give you more control over strength, and opens the door for creative projects. Grab your kitchen gear—let’s get started.
How to Make a DIY Bleach Pen at Home
You don’t need a chemistry degree or special ingredients to make an effective bleach pen. You likely have everything you need in your pantry or laundry room already. With a little time and these steps, you’ll be set for stain emergencies or a rainy-day art project.
Gathering Materials and Tools
Start by rounding up your ingredients and a few basic tools. There’s nothing fancy here—think simple, safe, and affordable.
You’ll need:
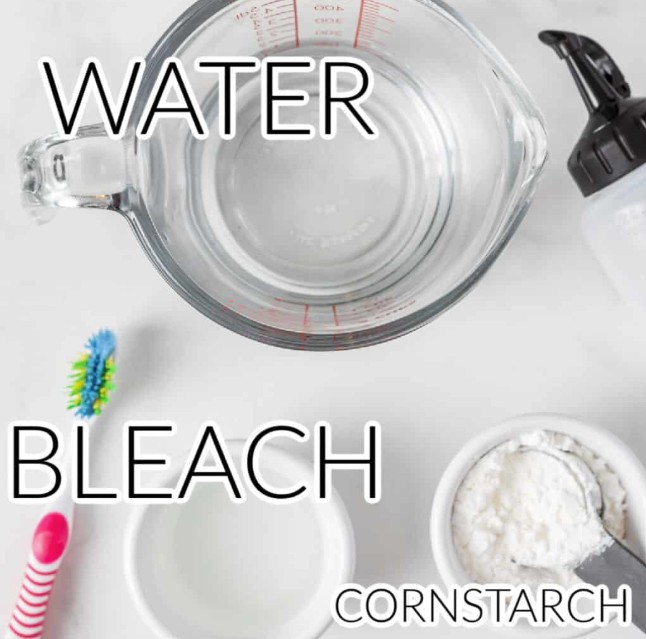
- Liquid bleach (unscented for best results)
- Cornstarch (found in baking aisles)
- Water
- A small saucepan (nonstick if possible)
- A whisk or spoon
- Measuring cups and spoons
- A small funnel (optional, but helps reduce mess)
- A squirt bottle or empty squeeze bottle (clean condiment bottles work great)
Tips for sourcing:
- Save and clean those ketchup or salad dressing bottles. The nozzles give you precision for drawing lines or treating small spots.
- Sometimes dollar stores have squeeze bottles in the crafts or kitchen section.
- Use an old bleach pen as the refillable container, if you have one.
Step-by-Step Bleach Pen Recipe
Homemade doesn’t mean messy or unpredictable. This recipe offers a thick, smooth gel that won’t run everywhere. You’ll be ready to touch up grout, fix laundry mishaps, or create unique shirt designs.
- Mix the base:
Pour 3/4 cup of water and 3 tablespoons of cornstarch into a small pan. Stir until the cornstarch starts to dissolve. - Cook until thick:
Set the pan over low heat and keep stirring. The mix will turn cloudy, then thicken up—almost like making gravy. Once thick and glossy, take the pan off the heat. Let it cool completely (this helps keep the bleach’s strength later). - Add bleach:
Measure out 3 tablespoons of plain liquid bleach. Stir it into the cool cornstarch mix until smooth. Be careful and make sure you have good air flow in the room. - Transfer to your squeeze bottle:
Use a funnel or spoon to add the gel to your cleaned and labeled bottle. Avoid splashing and wipe up any spills right away.
Helpful tip for control:
If your gel seems too thick, add a teaspoon of water at a time until it flows easily. If it’s too thin, cook a little more cornstarch and mix again (always cool before adding more bleach).
Troubleshooting and Storage Advice
Homemade bleach pens work well but sometimes need a little maintenance. Here’s what to do if you run into problems.
Common problems:
- Clogging:
Shake the bottle before each use. If the nozzle get clogged, rinse with warm water (don’t forget gloves). - Thin gel:
Gel that runs or pools needs a thicker base. Use less water next time, or add more cooked cornstarch. - Separation:
If the components separate after storage, shake before use. For longer-term storage, keep the pen in the fridge and use within a month for best strength.
Safety:
Never mix bleach with other cleaners. Wear gloves if you have sensitive skin or use it for deep cleaning grout. Rinse treated areas well to avoid residue or fabric breakdown.
Original DIY Bleach Pen Recipe
If you want the basic steps in a nutshell, here’s the core process for your homemade bleach pen.
DIY Bleach Pen
To make your own, gather:
- bleach
- cornstarch
- water
- a storage container
Instructions:
- Mix 3/4 cup water with 3 tablespoons cornstarch in a pan.
- Heat gently, stirring, until it thickens to a gravy-like texture.
- Cool fully, then stir in 3 tablespoons of liquid bleach.
- Transfer the bleach gel to a squeeze or condiment bottle. Click Here
- Use on stains or for creative projects—just apply, wait a minute, then wipe and rinse right away.
Pro tip:
Tackle clothing stains by letting the gel sit for 1 minute before blotting and washing. For grout or caulk, leave it for 3 minutes, then scrub and rinse. Always wash treated clothes soon after, as leftover bleach can damage fabric over time.
A DIY bleach pen offers more than just savings. You get a flexible tool that’s as useful for art as it is for laundry day. Try using it for T-shirt designs—draw, doodle, let the bleach work, then rinse to reveal your pattern. Tackle stained sneakers or bring tile grout back to life.
Always remember, bleach is powerful. Use your new pen in well-ventilated spaces, wear gloves if needed, and never mix it with other cleaners. With the right precautions, you’ll find yourself reaching for your homemade bleach pen again and again—whether you’re saving your favorite clothes or making something new.
Got a creative use for your bleach pen? Share your tips and results in the comments. Your next DIY win might inspire someone else.


