Lysol is a go-to cleaner for many homes. People use it to wipe down kitchen counters, bathroom fixtures, doorknobs, and other surfaces where germs like to lurk. But lately, you’ll notice more folks looking for homemade alternatives. Maybe they want to avoid certain chemicals, cut costs, or make sure the ingredients are safe for kids and pets. Others just like the control and the simple satisfaction of Make Your Own Lysol Spray mixing up their own cleaning solutions.
Toss out the idea that only big brands can keep your home clean. With a few basic ingredients and the right mix, anyone can make a homemade disinfectant spray that captures the job Lysol is famous for—killing germs fast and leaving things fresh.
Understanding Disinfectants and Lysol
Disinfectants do one thing really well—they kill germs on contact. They break apart the cell walls of bacteria and viruses, stopping them from making you sick. When you spray a surface with Lysol or any good disinfectant, you’re wiping out little colonies you can’t see.
Commercial Lysol contains a mix of active ingredients, usually involving ethanol or other alcohols, along with scents and stabilizers. The alcohol part is what takes down most common bacteria and viruses. The rest of the recipe helps with shelf life, evaporation, or how the spray smells and feels.
The Science Behind Disinfecting Surfaces
Disinfectants work by breaking down the protective outer layers of germs. Alcohols, like those found in Lysol sprays, stick to the germs’ membranes and dissolve them. This doesn’t happen instantly—most disinfectants need to sit for a few minutes to do their job.
“Don’t just spray and wipe immediately,” says Dr. Sara Wallace, an infectious disease expert. “Let the surface stay wet for at least a minute to give the solution time to work.” It’s a small detail, but it can make the difference between truly disinfecting and just spreading germs around.
Lysol Ingredients and Safety Considerations
Lysol’s formula has changed over the years, but most versions have alcohol (either ethanol or isopropyl alcohol) as the main germ-killing agent. Some also add hydrogen peroxide or quaternary ammonium compounds. While these chemicals work well on germs, they can be rough on certain surfaces or sensitive skin.
For anyone with young kids or pets, caution is key. Commercial Lysol sprays can trigger asthma, bother sensitive noses, or irritate eyes and skin. Always use in well-ventilated areas, and keep bottles stored out of reach.
How To Make Effective DIY Homemade Lysol
If you want to make a homemade disinfectant spray, you need to use ingredients that have real germ-killing power—not just smell good. It’s also wise to double-check that your recipe is safe for both your family and your furniture.
Essential Ingredients for Homemade Lysol Alternatives
Use these core ingredients for homemade disinfectant sprays:
- Isopropyl alcohol (rubbing alcohol, at least 70%): Kills bacteria and most viruses. Read the label—lower concentrations won’t be as effective.
- Hydrogen peroxide (3%): Targets a wide range of germs. It breaks down harmlessly into water and oxygen.
- Essential oils (optional): Lemon, lavender, or tea tree oil all add fragrance and some extra germ-fighting properties. Use high-quality, pure oils if you can.
- Distilled water: Dilutes the mix and helps the spray spread evenly.
You can find rubbing alcohol and hydrogen peroxide at any pharmacy or big-box store. Essential oils are everywhere these days, but check that you’re getting pure oil and not something with strange fillers.
Step-by-Step Instructions for DIY Disinfectant Sprays
Here’s a straightforward recipe you can trust.
Basic DIY Disinfectant Spray:
- Pour 1 and 1/2 cups of rubbing alcohol (70% or higher) into a clean spray bottle.
- Add in 3/4 cup of distilled water. (This thins the solution just enough for easier spraying but keeps the concentration strong.)
- Add up to 30 drops of essential oils for scent and a germ-killing boost (split between a couple of favorites like lemon and lavender).
- Screw on the spray bottle top and shake well.
Want more fragrance? Try orange, eucalyptus, or pine oils. For a bigger germ-killing kick, add a tablespoon of hydrogen peroxide to the bottle, but never mix vinegar and bleach—those fumes are dangerous.
Storage tips:
- Store your spray in a cool, dark place.
- Keep the bottle tightly sealed.
- Use within a month or two for best results. The alcohol can evaporate if not sealed well.
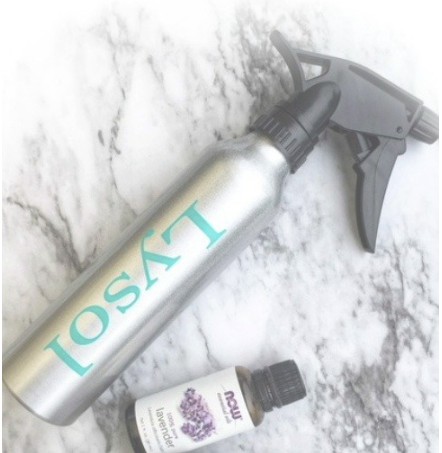
Original DIY Recipe (Mixing Up The Homemade Disinfecting Spray)
There’s nothing complicated about this recipe—just a few steps and you’re ready to clean:
- Add 1 and 1/2 cups of rubbing alcohol to the spray bottle.
- Pour in 3/4 cup of water.
- Drop in 15 drops of lemon essential oil and 15 drops of lavender essential oil.
- Screw the spray top on and shake it up.
That’s really all you need for a homemade Lysol-style spray. I use this around my kitchen sink, on doorknobs, and even on light switches when flu season rolls around. The smell is clean but not overwhelming, and the spray dries fast.
Common Mistakes and Safety Tips When Making Homemade Disinfectants
Making your own cleaners is simple, but these common errors can ruin the mix or make it unsafe:
- Wrong measurements: Too much water dilutes the solution, making it less effective. Too little can be harsh on skin.
- Unsafe ingredient combos: Never mix bleach with ammonia or vinegar. Stick to alcohol and hydrogen peroxide as your main germ-killers.
- Child and pet safety: Store bottles up high or in cabinets with child locks. Essential oils, in strong concentrations, can bother sensitive pets.
- Surface safety: Test your spray in an out-of-the-way spot. Alcohol can dull hardware finishes and discolor wood or certain plastics.
- Proper use: Always label your bottles clearly. Never reuse old food or drink bottles for cleaners. Don’t spray disinfectant directly onto food or toys—wipe afterwards with water if needed.


