Few foods grab attention like a well-cooked steak. The sizzling sound, bold aroma, and rich flavor come together in a way almost everyone loves. But steak isn’t just about tossing meat on the grill. It starts with picking the right cut and ends with hitting the perfect doneness. This guide gives clear steps, solid tips, and advice on choosing meat so you get the most out of every bite. If you want steak that turns out juicy, packed with flavor, and just the way you like it, you’re in the right place. Ready to make restaurant-quality steak at home? Let’s get started on how to cook the perfect steak.
Choosing the Right Steak Cut
Picking the right steak cut is the first real step to a restaurant-worthy meal at home. Each cut brings something different to the table. Your choice impacts flavor, texture, and even the ease of cooking. Let’s break down four popular steak cuts you’re most likely to see at the butcher or supermarket, then get into tips for choosing top-quality meat.

Ribeye: The Flavor King
If you want a steak with serious flavor and enough fat to keep things juicy, ribeye is your best bet. This cut comes from the upper rib section and is loaded with marbling (those thin streaks of fat running through the meat).
- Flavor: Rich, beefy, and often described as buttery.
- Texture: Tender and juicy, even if you cook it closer to medium.
- Best Cooking Methods: Great for both pan-searing and grilling thanks to its fat content, which helps prevent overcooking.
Personally, I reach for ribeye when I’m in the mood for a forgiving cut. You get a bold taste and a steak that can handle a bit more time over the heat without drying out.

Sirloin: Lean and Versatile
Sirloin is a solid choice if you want a steak that’s flavorful but not heavy. It’s cut from the back of the animal, near the hip. Sirloin tends to be leaner than ribeye, with a bit less marbling but plenty of beefy character.
- Flavor: Balanced, subtle beef flavors.
- Texture: Slightly firm and chewy, but still tender when cooked right.
- Best Cooking Methods: Takes well to grilling and broiling. Works for pan-searing, but pay attention to cook time to avoid toughness.
Sirloin steaks are perfect if you’re looking for everyday value without giving up taste. They cook up fast and won’t overpower lighter sides.

Filet Mignon: The Tender Favorite
If tenderness beats everything else for you, filet mignon is the classic pick. This cut comes from the tenderloin, one of the least-used muscles, so the result is silky smooth meat.
- Flavor: Mild, delicate, and a bit less “beefy.”
- Texture: Incredibly tender — you can often cut it with a fork.
- Best Cooking Methods: Pan-sear or broil. Filets tend to be thick, so consider finishing them in the oven for even doneness.
Filet mignon is the steak I grab when I want to impress or just treat myself. You don’t get as much intense flavor as with ribeye, but the melt-in-your-mouth texture makes up for it.

New York Strip: Best of Both Worlds
Also known simply as “strip steak,” this cut hits a sweet spot between flavor and tenderness. It’s taken from the short loin and features a solid amount of marbling without as much fat as ribeye.
- Flavor: Bold, classic steak profile.
- Texture: Firm yet tender, with a satisfying bite.
- Best Cooking Methods: Excellent on the grill or in a hot cast-iron pan. Holds up beautifully to both.
For many steak fans, the New York strip offers the best balance of chew and taste. It shows off the grain of the meat with just the right touch of richness.
Tips for Picking Quality Steak
The cut is only part of the equation. Here’s what to look for when picking steaks:
- Marbling: Look for fine white flecks of fat in the meat. This boosts both taste and juiciness.
- Firmness: Gently press the steak. A good cut should feel firm, not mushy or spongy.
- Color: Fresh steak is bright, cherry red. Avoid brown or gray spots.
- Thickness: Opt for steaks at least one inch thick. Thinner cuts cook too fast and dry out more easily.
- Butcher’s Advice: If you’re unsure, ask your butcher for recommendations or see what looks best in the case that day.
Think about the cooking method, your own preferences, and who you’re feeding. Whether you’re after melt-in-your-mouth texture, bold flavor, or something in between, the perfect steak for your table starts here.

Prepping Your Steak for Cooking
Getting your steak ready is more important than most people think. Good prep leads to better flavor, a gorgeous crust, and a perfectly cooked center. From seasoning choices to understanding the value of room temperature, a few small steps make all the difference. Think of prep as your secret ingredient—a minute or two of effort now pays off big later.
Seasoning Secrets for Enhanced Flavor
How you season your steak can turn decent meat into something memorable. There’s no one right answer here. It depends on the cut, your tastes, and what flavors you want to stand out.
1. Simple Salt and Pepper
If you start with high-quality steak, sometimes less is more. A liberal sprinkle of kosher salt and freshly cracked black pepper lets the natural beefy flavor shine through. Salt draws moisture from the surface, which helps form a crisp, savory crust. For most steaks, I season both sides right before they hit the pan or grill.
2. Dry Rubs
A dry rub brings personality to your steak. You can go classic with garlic powder, onion powder, and smoked paprika, or mix in herbs like rosemary and thyme. The texture from sugar and spices also boosts that crust when the steak cooks. Just don’t overdo it—too much rub can mask the meat itself.
3. Marinades
Marinades have two main jobs: adding flavor and tenderizing. They usually combine oil, acid (like vinegar or lemon juice), and aromatics. Thinner, leaner cuts like sirloin often benefit most from marinating for 30 minutes to a few hours. Pat the steak dry with paper towels after marinating to help with browning.
4. Herb Butters and Finishing Touches
Finished cooking but craving more flavor? Compound butters with garlic, herbs, or blue cheese can be spread on top while the steak rests. The butter melts and seeps into every crevice, making each bite rich.
Tips for Better Seasoning:
- Season thick steaks a bit earlier (15-20 minutes ahead). This lets salt go deeper.
- For thin cuts, season right before cooking to avoid drawing out too much moisture.
- Always pat steak dry with paper towels before applying seasoning. Less moisture means a better sear.
Why Room Temperature Matters
Pulling your steak from the fridge and letting it sit out before cooking seems like a small detail, but it’s not. Cold steak straight from the refrigerator won’t cook evenly. The outside can burn while the inside stays raw. Giving it a bit of time to lose the chill helps you nail that perfect doneness.
Here’s what I do: If I’m cooking a steak that’s an inch thick or more, I take it out 30-45 minutes before it touches the heat. For thinner steaks, 15-20 minutes does the trick.
What actually happens during this wait? The steak relaxes and warms up a little. This means you get:
- More even cooking: Heat gets to the center, so pinkness spreads from edge to edge.
- A better sear: Less surface moisture equals a crispier crust when the steak hits a hot pan or grill.
- Juicier results: The steak cooks more gently inside, holding onto juices.
If you’re prepping several steaks, set them out on a wire rack over a baking sheet (this keeps air moving all around for more drying power). Pat them dry with paper towels before they hit the heat. The less surface moisture, the better the Maillard reaction—that’s chef speak for tasty, caramelized browning—when you cook.
Prepping isn’t flashy, but it’s the groundwork for a steak that rivals any steakhouse. Pay attention to these small steps and you’ve already won half the battle.

Cooking Methods for the Perfect Steak
Picking the right cooking method makes all the difference when aiming for a steak that’s tender in the middle and perfectly charred on the outside. Steak isn’t fussy, but it rewards attention to basics—heat, timing, and a bit of patience. Here’s how to make the most out of classic techniques, along with some tips from my own kitchen experiments.
How to Pan-Sear a Steak Step by Step
Pan-searing is quick, reliable, and can be done in any kitchen with a good-quality skillet. If steakhouse flavor is your goal, this method gets you close without special equipment.
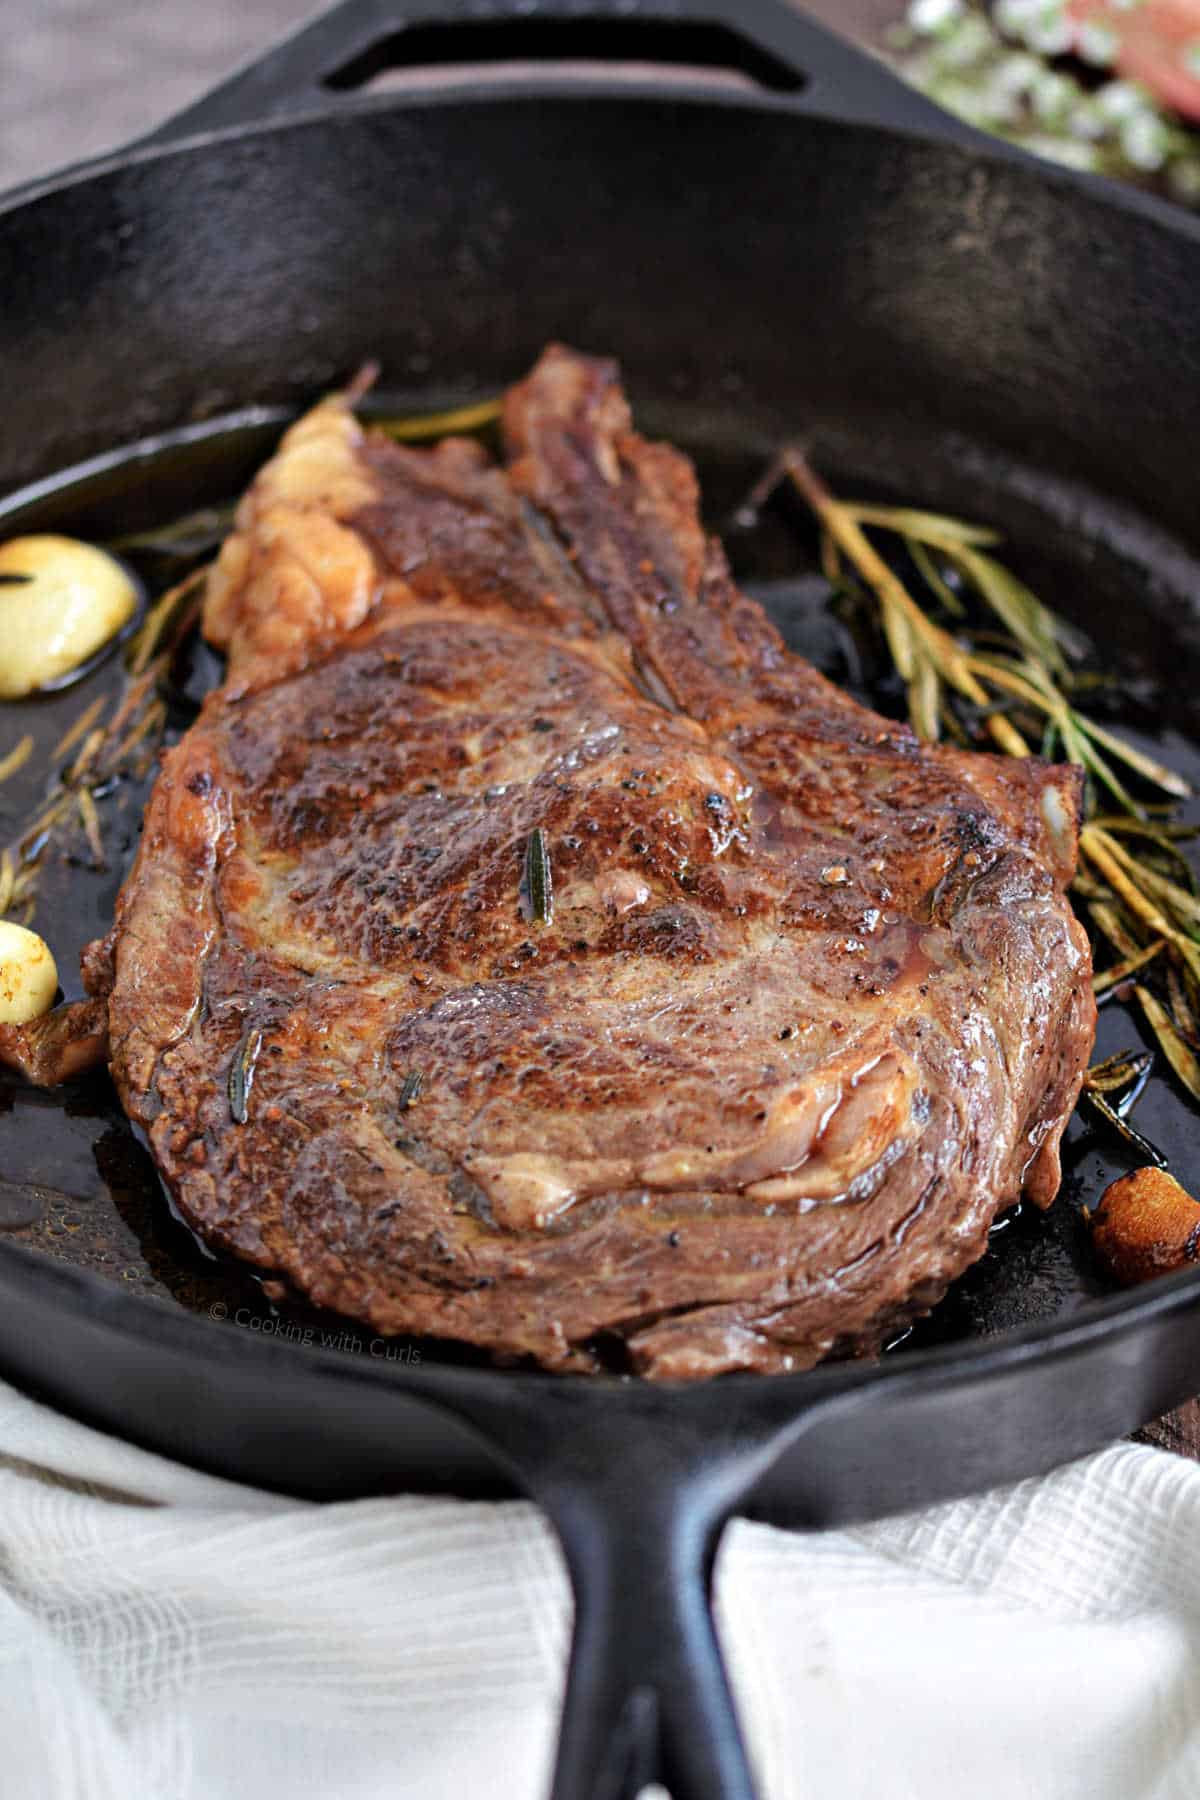
Start with a heavy pan—cast iron holds heat best. Get the pan very hot before your steak goes in. That’s how you build that golden-brown crust.
Follow these steps:
- Preheat your pan over medium-high until it’s almost smoking.
- Pat the steak dry, then season generously with salt and pepper.
- Add a tablespoon of oil (canola or avocado) to the hot pan. Drop in your steak. It should sizzle loudly.
- Don’t move the steak for at least two minutes. This helps form that crispy crust.
- Flip the steak once, using tongs. If you’re feeling fancy, add a knob of butter, smashed garlic, and a few sprigs of thyme or rosemary at this point.
- Tilt the pan and spoon the melted butter over the steak while it finishes cooking.
- Check doneness with a quick poke (springy for medium-rare) or a meat thermometer. Pull at 130–135°F for medium-rare.
- Rest the steak on a plate, loosely covered, for five minutes so juices can settle.
Pan-searing pros: Quick, intense flavor, crispy seared edges
Cons: Can get smoky, not ideal for very thick cuts
Best for: Ribeye, New York strip, sirloin, filet mignon
Grilling a Steak: Tips and Instructions
Grilling delivers smoky flavor and distinct grill marks that just feel like summer, even indoors with a grill pan. The key is using both direct and indirect heat, depending on how thick your steak is.
Here’s how I get it right:
- Preheat: Heat your grill until it’s hot. Clean the grates and oil them lightly.
- Season: Salt and pepper or your favorite dry rub.
- Direct Heat: Start your steak over direct, high heat to sear each side for 2–3 minutes.
- Indirect Heat: Move the steak to a cooler part of the grill to finish cooking if it’s thick. Thinner steaks can finish right over the heat.
- Lid Closed or Open: Close the lid for thicker steaks to create an oven effect.
Tips for a great grilled steak:
- Don’t press down on your steak. That squeezes out the juices.
- Let the steak rest off the grill for at least five minutes.
- For cross-hatch grill marks, rotate your steak 45 degrees halfway through searing each side.
Grilling pros: More flavor from smoke, large batches at once, less mess in the kitchen
Cons: Weather dependent, harder to control temp
Best for: Ribeye, strip, flank, and skirt steak
Reverse Sear Technique for Thick Steaks
This method is a personal favorite for steaks over 1.5 inches thick, like a fat ribeye or porterhouse. You cook the steak low and slow in the oven, then finish with a blazing hot sear in a pan or on the grill. This gets you a steak that’s edge-to-edge pink with a crisp crust.
How I use the reverse sear:
- Preheat your oven to 250°F.
- Place steak on a wire rack set over a baking sheet.
- Cook in the oven until the internal temp is about 10–15 degrees below your goal (120–125°F for rare, 130–135°F for medium-rare).
- Rest at room temp for five minutes while you heat up your pan or grill as hot as possible.
- Sear each side of the steak for 1–2 minutes until deeply browned.
- Rest again before slicing.
Why use the reverse sear?
- Steaks come out perfectly even with almost no gray banding near the surface.
- It’s easier to hit the exact doneness you want.
- Less risk of burning the outside while waiting for the inside to catch up.
Reverse sear pros: Precision, amazing crust and interior texture
Cons: Takes more time, not for thin steaks
Best for: Bone-in ribeye, porterhouse, thick-cut filet
No single method works for every steak or every cook. Try different approaches and adjust for your kitchen and your taste. Each of these techniques brings out something special in the meat if you take your time and trust the process.
Testing Doneness and Resting Your Steak
You’ve picked a great cut and worked hard to sear and cook it perfectly. Now comes the moment of truth—checking doneness and giving your steak a well-earned rest. This step makes all the difference between a steak that’s just okay and one that packs real flavor and tenderness in every bite.
Understanding Steak Doneness Levels
How cooked do you want your steak? Everyone has a go-to answer. Some like it rare and blushing in the center, while others want every trace of pink gone. Regardless, the key is knowing exactly what you’re aiming for and how to spot the signs that your steak is just right.

Here are the standard doneness levels and what you can expect:
- Rare: Cool, red center. Very soft to the touch. Internal temp is 120–125°F.
- Medium-Rare: Warm, red center. Slightly springy. 130–135°F is the target (most popular pick, and for good reason—it stays juicy).
- Medium: Warm, pink center with some firmness. 140–145°F.
- Medium-Well: Slightly pink center, mostly brown throughout. Firm, but not tough. 150–155°F.
- Well Done: No pink at all, and the meat is completely brown. Firm and can easily dry out. 160°F and above.
Some people use the finger test to check doneness—gently press on the meat and compare it to the feel of different parts of your hand. It’s not as accurate as a thermometer, but it helps in a pinch:
- Rare: Feels squishy, like the base of your thumb when your hand is relaxed.
- Medium: More resistance, like when you make a loose fist.
- Well Done: Very firm, like the center of your palm.
Don’t forget: steak keeps cooking for a couple minutes after you pull it from the heat. Always stop cooking just before you hit your preferred level.
Using a Meat Thermometer Correctly
A meat thermometer takes the guesswork out of steak night. Even seasoned cooks reach for one, especially with thick or expensive steaks. It’s the fastest way to get consistent results without cutting into the steak and letting all those juices escape.
To use a meat thermometer the right way:
- Insert the probe into the thickest part of the steak, not near the bone or fat. Go in from the side if you can for a more accurate reading.
- Avoid touching the pan, grill grates, or bone—these will throw off your reading and give you a false sense of doneness.
- Watch the numbers climb. The moment you get close to your target temperature, pull the steak off the heat.
- For extra accuracy, check a couple of spots—especially if your steak is unevenly thick.
Typical doneness target temps:
- Rare: 120–125°F
- Medium-Rare: 130–135°F
- Medium: 140–145°F
- Medium-Well: 150–155°F
- Well Done: 160°F and up
Why rest the steak? Resting is non-negotiable if you want the juiciest results. As steak cooks, its juices get pushed to the center. Letting it rest (tented loosely with foil) for 5–10 minutes allows those juices to redistribute and settle. If you skip the rest, you’ll watch all the flavor run out on your plate.
Quick tips for best results:
- Always use a clean thermometer.
- Double-check the temp near the end—even thin steaks can overcook fast.
- Don’t slice your steak before it rests, no matter how hungry you are.
Testing doneness and letting steak rest are the bookends to all your hard work. A couple of careful steps here make every steak night feel like a win.

Serving and Enjoying Your Steak
You’ve cooked a steak that looks and smells amazing. The work isn’t over yet. How you serve and slice your steak—and what you pair it with—sets the stage for an experience that goes well beyond the basics. With just a few small moves, you can turn your steak dinner into the center of a great meal.
Slicing for Maximum Tenderness
The right way to slice steak makes a difference with every bite. A sharp knife is your friend here. Always slice against the grain (look for the direction the muscle fibers run and cut perpendicular to them). Cutting this way shortens the fibers, making each piece more tender and easier to chew.
- Tip: If you aren’t sure about the grain, look at the cut from the side and trace the lines with your finger.
- Thicker steaks like ribeye or sirloin can be sliced into half-inch strips.
- For something like flank or skirt steak, go thinner—quarter-inch slices do the trick.
- Slice only what you plan to eat right away. Leftover steak keeps its juice best when left whole.
Letting the steak rest before you cut is not optional. It gives you those juicy, restaurant-style slices instead of a pool of lost flavor on your plate.
Picking the Right Sauces and Sides
A great steak can stand alone, but thoughtful pairings tie the whole meal together. You don’t have to overcomplicate things—simple sauces and classic sides let the steak shine but add depth to every plate.
Easy Sauce Ideas:
- Herb butter: A mix of soft butter, garlic, and fresh herbs (try parsley, chives, or thyme)
- Chimichurri: Bright, herby, and loaded with parsley and garlic—especially good with beef
- Peppercorn sauce: Creamy, spicy, and feels fancy in just a few minutes
- Red wine reduction: A splash of wine simmered with shallots or onions for a steakhouse touch
Classic Sides:
- Crispy roasted potatoes or mashed potatoes
- Grilled or steamed vegetables (asparagus and green beans work well)
- Garlic bread or a warm baguette for soaking up juices
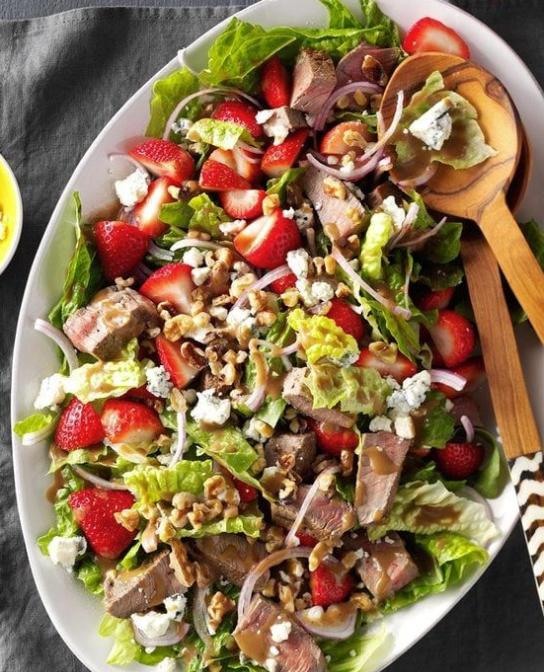
- A crisp, simple salad with vinaigrette to cut the richness
If you want more color or variety, toss some cherry tomatoes, sautéed mushrooms, or caramelized onions alongside the steak.

Tricks for Impressive Presentation
A good-looking plate makes eating more fun. It doesn’t take chef skills to make your steak look and feel special. A few tweaks can give you that out-to-dinner feeling at home.
- Rest and Slice: Give your steak time to rest, then slice it neatly and fan the pieces out on the plate.
- Drizzle: Spoon a little sauce or melted butter over the steak just before serving for a glossy finish.
- Garnish: Fresh herbs like parsley or thyme add color and hint at the flavors inside.
- Sides First: Arrange your vegetables or potatoes first, then add steak so it sits proudly on the plate (not crowded by everything else).
- Wipe Plate Edges: Restaurant trick—make sure the edge of the plate is clean for a tidy look.
Shortcut for dinner parties: Serve the steak sliced on a big platter with sauce on the side. Guests help themselves, and you avoid repeating trips back to the kitchen.
It’s not just about cooking the steak right. Taking an extra minute with slicing, pairing, and plating can turn your kitchen into your favorite steakhouse—no reservation needed.
Enjoy
A great steak comes down to a few simple details: picking the right cut, handling prep with care, giving your full attention to the cooking process, and respecting the final rest. New tools like a meat thermometer make it easier to get repeatable results, whether it’s your first time or your hundredth.
Don’t be afraid to adjust the seasoning or try a different cooking technique. Your own tastes are what matter most, and the best steak is the one you enjoy eating. Drop your questions, swaps, and steak successes in the comments—I always enjoy seeing what works in other kitchens.
Thanks for reading and happy steak night!


